While we have started plants from seeds in years past, we have not always had luck. Last year, for example, we used some existing shelving in our mudroom. We thought that room was perfect with the many windows on the southern side of the house. However, the room is cold because it is just an old framed in porch has the door we use to go in and out of the house. Also, in this part of the world, the sun isn’t exactly reliable in shining every day this time of year. We did purchase seed warming pads, which helped. But the biggest problem was that our indoor cats decided to eat most of the starts that popped up! We did buy organic starts locally, but were limited to what was available a bit later in the season.

Something Different This Year
In addition to buying more seed warming pads, we invested in some grow lights. Now we can control the lighting the plant starts receive as well as the warmer temperatures with the warming pads.
I use a plastic shelving unit in the video that we already had. There is room to place two trays on each of those shelves. However, to accommodate even more trays of seeds, we did purchase another shelving unit that has adjustable shelves and room for one tray per shelf. The adjustable shelves can be beneficial for growing starts at various stages of the growing period. There is a link to that unit below.

Attaching the Lights
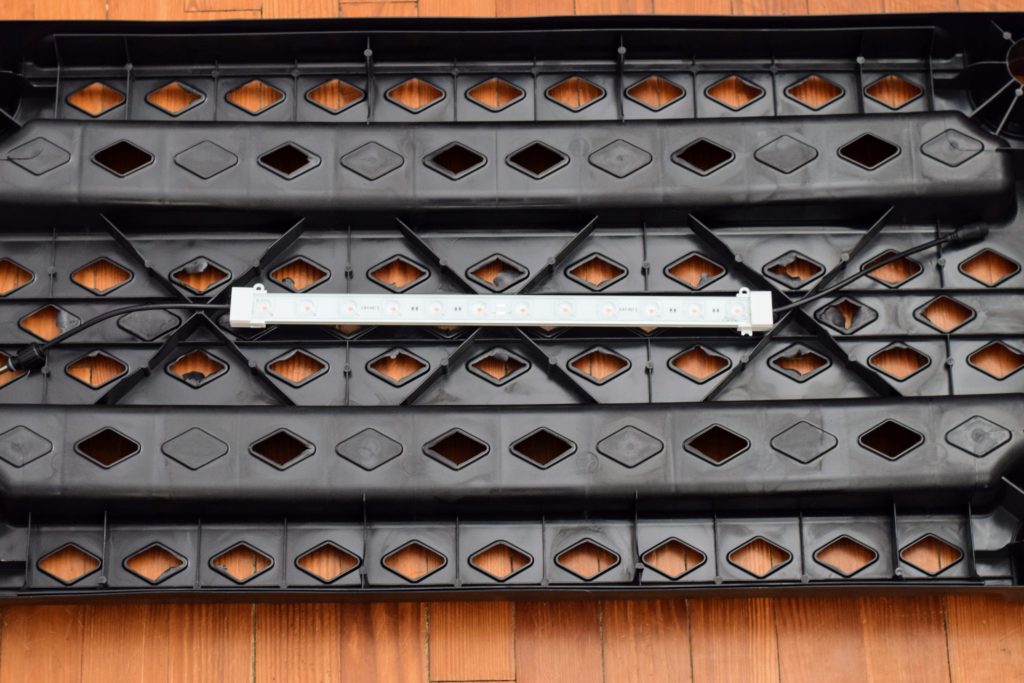
You can attach these lights to the shelves in one of three ways (the company provides each way in the package):
- Screw into the shelf
- Use sticky pads
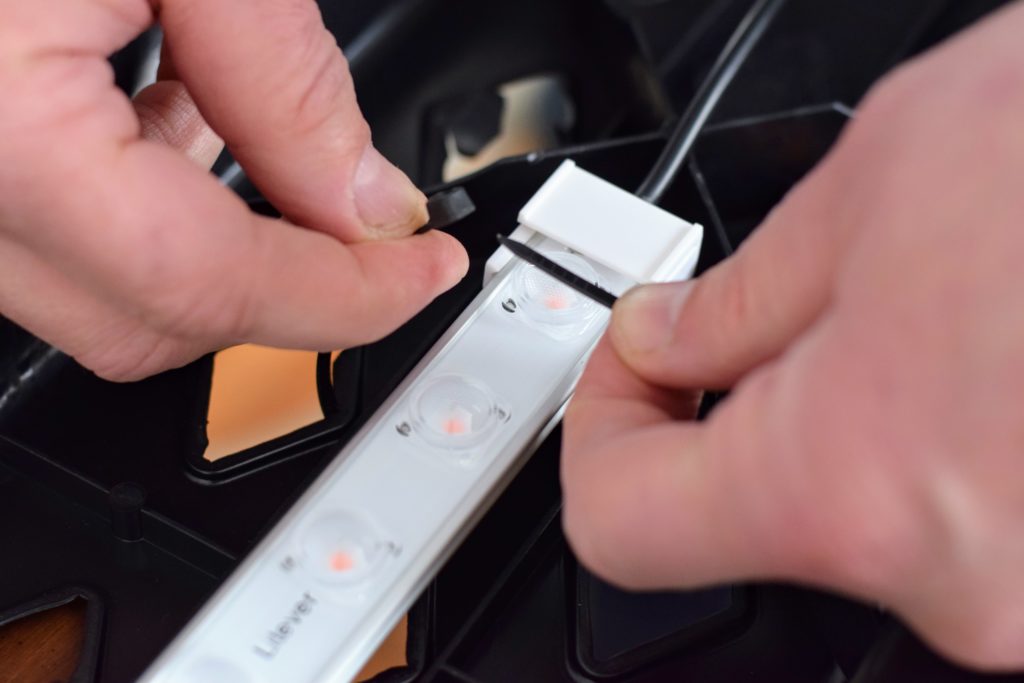
- Utilize the plastic ties
I find with the two different shelving units we use (one plastic as shown in the video, and one metal) the plastic ties work the best! We found that attaching the lights with the little screw holes doesn’t work very well, but will cause the holes to break. A better way is to wrap the zip tie around the light strip between bulbs. The lights are very easy to attach to the shelves and they all link together so they can be controlled with one plug. The cords on the lights are long enough to offer flexibility with placement and orientation.

Once you assemble the shelves and attach the lights, connect the lights together and plug them in! We put ours on a timer so the lights are on for about 12 hours and off 12 hours.
Place the seed-warming pads (which I called “heating pads” in the video) on the shelf and plug those in as well.
You can then place your seed trays on those pads and be sure to keep the soil watered! It works best when you actually place soil and seeds in the tray (unlike in the video). You can check out that blog and video on soil blocks coming soon!
Shopping for Supplies
Spirit’s Freedom Farm is a participant in the Amazon Services LLC Associates Program, an affiliate advertising program that provides a means for us to earn fees by linking to Amazon.com and affiliated sites
Watch our Video
Sign Up for our Free Row Markers eBook by clicking the picture below!

It doesn’t get much better!